
It’s been a while since I posted about a loaf of
bread. I’ve been baking, but not as frequent as I would have liked to. Last few
weeks were very hectic. The ultrasound on my yearly checkup of my breasts
showed a possible malignant mass, but luckily it was benign. But before we knew
this we had some troublesome weeks. The hospital which can deal with this kind
of problems is a four hours drive away through the mountains in the north of
Thailand. We could only see the doctor in the evening so we had to stay
overnight. It took four appointments and one operation before we got the good
news that the cyst was benign. So lucky us!!!!
During all the waiting for the results I tried to bake
some bread; normally it helps me to relax and meditate. But it was hard to
concentrate.
Now everything is back to normal. And there was a big necessity
to bake bread because we ate all the breads out of the freezer.
Today I went again for delicious Ciabatta and a Multigrain
Norwich Sourdough. Whenever I want to bake failure-proof bread, I go for
Norwich Sourdough. This bread has a delicious crumb with a crunchy crust; the
way a good sourdough should be (for us).
Since I soak the multigrain they are chewable instead
of tooth breaking. And they don’t stick between your teeth. The main reason I
choose multigrain is because it tastes great; it gives the bread a nutty
flavor. And I also added some delicious sunflower kernels. And of course it's very healthy!

I made one big loaf of 900 gr.
This is what I used:
400 g white flour: 300 g all purpose flour and 100 g bread flour
25 g rye flour
25 g whole wheat bran
40 g multigrain (soaked in boiling water)
20 g sunflower kernels (soaked too)
300 g water at about 25°C; 250 g for the dough and 50 g for soaking the seeds
190 g ripe 100% hydration sourdough starter
12 g salt
This is what I did:
First I soaked the multigrain and
the sunflower kernels in 50 g of boiling water. I like it this way; otherwise
the seeds can be teeth breaking.
In the bowl of a stand mixer, mix
the flours, water and starter on low speed until just combined, about one minute.
Let the dough rest (autolyse) for 30
minutes.
Add the salt and continue mixing on
low or medium speed until the dough reaches a medium level of gluten
development. This should only take about 3 or 4 minutes. During the last minute
add the soaked seeds.
Transfer the dough to a slightly oiled
container, cover and ferment at room temperature (22-25°C) for 2.5 hours, with folds
at 50 and 100 minutes.
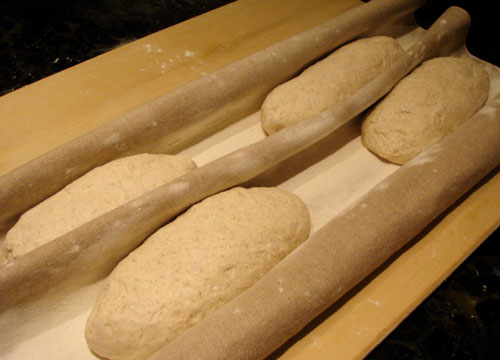
Turn the dough out onto a lightly
floured counter. Pre-shape the dough into a light ball.
Sprinkle the ball lightly with
flour, cover loosely with plastic, and let rest for 15 minutes.
Cover the banneton with a moist
towel and at room temperature for 2 – 2,5 hours. I proved for 1.5 hours at room
temperature because of the temperature in the house.
Meanwhile, preheat the oven, with
baking stone, to 250°C. For steam I placed a bread pan with stones.
Turn the proofed loaves onto parchment
paper on a peel. Boil the water for steaming. Slash the loaf and put it on the
baking stone.
Once the loaf is in the oven, turn
the heat down to 230°C and poor the boiling water on the hot stones. I baked it
for 15 minutes with steam, and another 25 minutes without steam. I turn the
oven off and left the open ajar.
Cool on a wire rack. Don’t cut until
the loaves are completely cool, it will be worth the waiting.

Adapted from Wild Yeast
I
send this to Susan’s YeastSpotting and Heather of Bake Your Own Bread
No comments:
Post a Comment